
2 stroke outboard motors are a convenient way to power a small machine, but they can be tricky to maintain. If your engine keeps dying, there are a few things you can do to fix the problem. So, how do you fix a 2 stroke outboard that keeps failing?
Here is how to fix a 2 stroke outboard that keeps dying:
- Clean the carburetor and air filter.
- Check the spark plug and replace it if needed.
- Check the driveshaft, propeller shaft, and trim tab.
- Check the propeller and replace it if needed.
- Replace worn seals on the engine.
- Inspect the fuel lines.
- Inspect the water pump impeller.
- Replace worn-out cables on the outboard motor.
- Check the coolant level.
- Top up the gas tank with fuel and stabilizer.
- Lubricate the throttle linkage.
- Contact an authorized service technician.
This article will show you how to troubleshoot and fix a two-stroke outboard that won’t start. Follow these steps, and you should be up and running in no time.
1. Clean the Carburetor and Air Filter
If your engine starts but dies as it’s running, the carburetor or air filter might be dirty. When this happens, the fuel won’t mix properly with the air. So, you’ll have to clean out any gunk from your carburetor’s interior and clear any debris from around or under the air filter (source).
To clean the carburetor, follow these steps:
- Remove the fuel shutoff valve from the side of the outboard motor.
- Disconnect the lines to and from your outboard motor.
- Unscrew the top of the carburetor.
- Soak the carburetor in gasoline for an hour or two.
- Scrub the inside of the carburetor with an old toothbrush to remove any debris, then spray it with carburetor cleaner.
- Reassemble the carburetor and screw it back onto your engine.
Caution: Never smoke or allow open flame near gasoline.
To clean the air filter, follow these steps:
- Remove the air filter from the side of your outboard motor.
- Clean out any debris in your air filter with an old toothbrush or can of compressed air.
- Replace your air filter and make sure it is secure.
Note: Always consult your owner’s manual for specific instructions on cleaning or replacing your air filter.
2. Check the Spark Plug and Replace It if Needed
If your engine is running poorly or not at all, it might be due to a faulty spark plug.
It’s a good idea to check your spark plug before doing any extensive work on your outboard motor. The spark plug should have a white ceramic tip and 12 evenly spaced gold electrodes around the base.
As a rule of thumb, you should inspect and replace your motor’s spark plugs annually or after every 100 hours of running your two-stroke engine, whichever comes first. However, if your plugs are black or fouled with carbon, you must replace them immediately (source).
To replace your spark plug, follow these steps:
- Unscrew the spark plug cap.
- Remove the old spark plug.
- Insert a new, high-quality spark plug by hand to avoid cross-threading it.
- Screw the spark plug cap back on and tighten with a wrench or socket set.
Remember: Always use a spark plug recommended for your model by the manufacturer (source).
3. Check the Driveshaft, Propeller Shaft, and Trim Tab
If you’re running your engine at full throttle but not achieving top speed or experiencing wobbling in the outboard motor, you should check your driveshaft, propeller shaft, and trim tab.
To check these components, follow these steps:
- Turn off your engine.
- Disconnect the driveshaft from the prop by undoing the clamp bolt and nuts on both sides of the outboard motor with a socket wrench or crescent wrench.
- Inspect your driveshaft for dents or cracks along its length.
- Make sure the drive shaft rotates freely.
- If it doesn’t, check your propeller shaft for obstructions.
- Check the trim tab cable connection to make sure it is secure.
- Reattach everything in reverse order of how you took it apart and tighten bolts with a socket or crescent wrench.
4. Check the Propeller and Replace It if Needed
If your engine sounds like it’s straining to reach top speed, but you’re not sure why, check your propeller.
The pitch of the blades should be correct for maximum speed with little or no vibration. Damaged or bent propellers can cause this issue as well, so make sure your propeller is in good condition before moving on.
To inspect the propeller, follow these steps:
- Remove your propeller by undoing the nuts that hold it in place with a socket wrench.
- Inspect the rubber stopper for wear and tear as you spin it around by hand.
- Check for nicks, dents, and cracks in your propeller blades.
- Check to make sure the prop shaft is straight.
- If something looks wrong with your propeller, replace it now. It might save you time and money later.
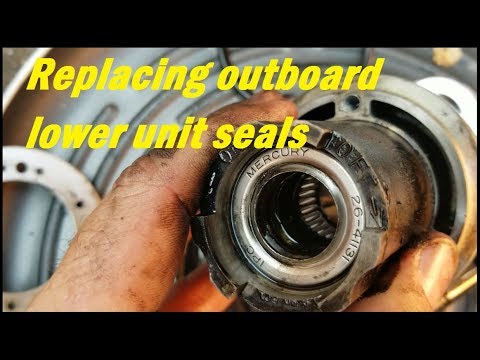
5. Replace Worn Seals on the Engine
You can get an idea of whether or not your outboard motor’s seals need replacement by looking for leaking oil, water, or fuel. If so, you should replace them as soon as possible since worn-out seals can damage the rest of your engine.
This video demonstrates the steps to follow when replacing seals on an outboard motor:
6. Inspect the Fuel Lines
Your engine’s fuel lines are a prime culprit for engine problems since they can clog or leak. As a result, you should inspect your fuel line every time you clean your outboard engine.
To inspect your fuel lines, follow these steps:
- Inspect the line from the tank to the motor for cracks and leaks.
- Drain any water or debris from the motor’s gas tank into a suitable container.
- Look for fuel leaks.
- If you find a leaky hose, replace it immediately with a high-quality hose.
Pro Tip: Check for leaks in your vehicle’s storage compartment or tank by checking for wet spots regularly. You might also want to invest in a fuel leak detector to help you find leaks the moment they occur.
7. Inspect the Water Pump Impeller
If your engine is taking longer than usual to reach top speed, it’s time to inspect the water pump impeller and replace it if needed. The impeller in a water pump forces pressurized water into the engine block, allowing gas and oil combustion.
If your impeller isn’t working, you’ll need to get it replaced by an authorized service technician or a professional mechanic.
8. Replace Worn-Out Cables on the Outboard Motor
If your outboard motor is slow to rev up or if it stalls when shifting into drive, your cables might need replacement.
To replace worn-out cables, follow these steps:
- Use a crescent wrench to remove the screws that hold the cable cover in place.
- Remove the throttle and shift cables from your outboard motor.
- Replace worn-out throttle and shift cables with high-quality replacements (Ensure you check your owner’s manual for specific information about what kind of replacement cable to use).
As a rule of thumb, you should check your unit’s throttle and shift cables at least once a year to make sure they’re in good condition.
9. Check the Coolant Level
Low coolant levels can lead to overheating and severe engine damage, so make sure your outboard motor’s coolant is at the proper level to avoid problems like the engine dying completely.
If your outboard motor overheats, you should arrange for its repair as soon as possible because disruptions to the cooling system can cause severe damage to the engine.
To ensure that your coolant is at the proper level, follow these steps:
- Remove the cap from your engine’s coolant reservoir.
- Use a stick to check the coolant level in the reservoir.
- If your coolant is low, add the proper water-cooling system fluid until the level reaches MAX.
10. Top Up the Gas Tank With Fuel and Stabilizer
A low gas level is another common cause of engine failure. If you notice that your motor is cutting out or that it’s not running at full speed, fill the tank up with the proper fuel and fuel stabilizer to solve this problem.
If there are visible signs of water in your gas tank, use a water separator to remove the water like this CARMOCAR Marine Fuel Water Separator (link to Amazon). It not only drains the water and muck in your fuel but also features a transparent collection bowl to help you monitor the quality of the fuel.
11. Lubricate the Throttle Linkage
If you use your outboard motor frequently, you should lubricate the throttle linkage and shift levers to prolong its lifespan and keep it working correctly. Otherwise, you might find that your throttle and shift levers get stuck or wear out more quickly than usual.
To lubricate your throttle linkage, follow these steps:
- Apply a small amount of lubricant to the throttle and shift levers.
- Turn your outboard motor on and turn it off again after a few minutes to let the lubricant set in.
12. Contact an Authorized Service Technician
If you’ve tried all these suggestions and your motor is still acting up, contact an authorized service technician to get it running smoothly again. If the issue continues, the outboard motor might need repair or even a replacement.
Your local authorized service technician will be able to inspect the engine’s cooling system, the transmission, and all of the moving parts inside. They’ll examine everything in detail and give you an estimate of how much your repairs might cost before they start working on it.
Tip: If your outboard motor is still under warranty, contact the service center that issued it to see if you can get a replacement. You should also have it inspected annually or after every 100 hours of use. In addition, check the manual from the manufacturer to find out when the warranty expires.
Note: Every two-stroke engine is different, but some of these steps might apply to your motor. The best way to fix a two-stroke outboard that keeps dying is to check the basics first. Before tweaking and adjusting, make sure you have set everything up correctly. It’s often the simplest fixes that correct the most common problems.
FAQs
Why Does My Outboard Motor Keep Dying?
If your outboard motor keeps dying, it could be due to running out of gas, running out of coolant, or an overheating engine. Other common causes include dirty or clogged fuel filters, faulty fuel lines or carburetors, and loose spark plugs.
That said, a little TLC can go a long way. The more you check and maintain your outboard motor, the less likely it is to break down when you’re in the middle of the lake.
Here are some tips for how to properly care for your outboard motor:
- Make sure the fuel filter is clean and replace it when needed.
- Check the oil level regularly and change the oil when needed.
- Clean the propeller and intake ports regularly
- Replace the impeller every three years.
- Drain the fuel tank and carburetor every time you store the machine to prevent corrosion.
If you follow these simple steps, your outboard motor should keep running smoothly for years to come.
Why Does My 2 Stroke Bog When I Give It Gas?
Bogging out is a common problem most two-stroke owners often encounter. So, what causes it?
Your 2 stroke may bog when you give it gas if the engine is overheating, has too much oil in the gas mix, has low octane gasoline, or has a dirty air filter. Also, fouled or loose spark plugs, a malfunctioning stator, damaged wiring, or incorrect timing can cause bogging.
Quick fixes to your outboard motor bogging include:
- Ensuring the fuel to oil ratio is 50:1.
- Cleaning the air filter.
- Repairing or replacing any damaged components.
- Ensuring that your fuel and spark plugs are clean and working correctly.
- Reduce your RPMs and increase your idle speed if needed.
If you still have trouble after trying these techniques, you might need to call a service technician or a mechanic.
Final Thoughts
To keep your outboard motor running smoothly, you should follow a regular maintenance schedule. Checking and replacing fluids is a great habit to get into, especially if you’re working on a more expensive outboard motor.
However, contact your local authorized service technician if your motor keeps dying on you no matter what you do. They’ll be able to inspect your outboard motor and tell you if it’s fixable or if you need a new one. For the best results, ensure you check your owner’s manual for recommendations.
Recommended Reading: