
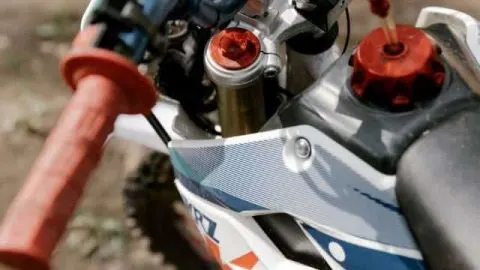
Cleaning the gas tank of a two-stroke engine is not a difficult task. There are only a few steps to the process.
Remove the gas tank and secure the gas line with a clamp to prevent leaks and dirt or other debris from entering the line. Use a high-pressure water hose to break free any debris and wash it out until it is clean. Make sure there is no water in the tank before reattaching the tank to the engine.
Cleaning the gas tank of a two-stroke engine is important. Read on to learn more about the various methods of cleaning the gas tank of a two-stroke engine.
Cleaning the Gas Tank of a Two-Stroke Engine
The gas tank can be cleaned out with water. There are also different methods and cleaning chemicals that can be used to ensure that the gas tank is debris-free.
There are two main ways in which to clean out the gas tank, one is using the high-pressure water method, and the other is using chemicals. Each has its own benefits and drawbacks, as explained below:
| Method | Benefits |
| High-Pressure Water | High-Pressure WaterCost-effectiveEasy to use |
| Chemicals | Easy to useEnsures that all debris, even minute amounts are removed |
High-Pressure Water Method
The easiest way to clean out the gas tank from a two-cycle engine is to use what you already have in your home: your tools and water. First, ensure that all of the bolts and/or screws are removed from the gas tank before going on to the next step.
Once the gas tank is free, remove the gas line while ensuring there is a minimal spill from any gas that is still in the line. Make sure that you clamp the line to prevent any other fuel spillage and to prevent any dirt and/or debris from entering the line.
When the line is clamped, you can move onto the gas tank itself. If there is any gas left inside of the tank, pour it into a suitable container utilizing a clean funnel. That ensures that the gas is removed from the tank and can be reused if there is not any debris in it.
Inspection of the Gas Tank
Once the gas tank is empty, ensure that you visually inspect all of it to ensure there are no cracks, breaks, or any other issues with the tank itself that would warrant replacement.
If there are cracks in the tank, replace the tank instead of buying additives that claim that they fill those cracks, and prevent leakage. Depending on the item you are working on, replacing a gas tank can run anywhere from $35 to over $100.
Replacing the tank is suggested because if the tank is already cracking, even an additive that says it will fill the cracks is not suitable for long-term wear.
If you are going through the trouble of working on the gas tank and cleaning it out, why put it back together if you are only going to be in a similar situation down the road? You might as well get it all fixed right the first time.
Cleaning the Gas Tank
If your gas tank is free of damage, utilize a high-pressure water hose to clean out any debris inside of the tank. Take care to visually inspect the inside of the tank to ensure there is nothing left after cleaning it.
Let the gas tank sit until it is completely dried out before reattaching to the engine. Once you have ensured that the tank is free of any water or debris, you can reattach the tank to the engine, and you have completed your job!
| Pros | Cons |
| Cost-effective | May have to buy a high-pressure hose adapter to complete the job properly. |
| Quick and Easy | Water may not remove any material build-up that cannot be seen by the human eye |
Chemical Method
Repeat the steps labeled above to remove the gas tank from the engine and secure the gas line. Once this is completed, complete your visual inspection, and if the gas tank is free of any debris that you can remove by hand and free of damage, go on to the next step.
Pour the fuel tank cleaner into the tank as explained in the directions. Most of these chemicals need to be diluted with a certain amount of water to work properly. Please ensure that you follow the instructions carefully.
Once the chemical is placed with the proper amount of water inside of the fuel tank, swirl around the mixture by hand to spread out the chemical evenly throughout the tank. Once this step is completed, drain the mixture into a safe receptacle and allow it to dry thoroughly before reattaching to the engine.
| Pros: | Cons: |
| Easy to use | Cost. Whereas cleaning the gas tank with water may cost, at most, under $20, you must purchase the right chemicals for this job, which will run over $30 and up, as explained above. |
| Ensures that any material that cannot be seen by the eye is also removed during clean up |
Fuel Lines
After long periods, fuel lines can become hard and brittle. It only makes sense that if you are going to take the time to clean out the fuel tank, you might as well replace the fuel lines while you are at it to save you time later down the road.
Fuel lines, for the most part, are cheap and easy to buy. You can get them at most hardware stores or buy them off Amazon for the specific item you are working on. The cost for the fuel line itself will vary depending on what you are working on.
Replacing the fuel lines is usually straightforward as you simply follow the lines from the tank that you have removed to where they go on the engine. You may have to remove filters or other objects to get to where they go, but overall, it is a simple task.
Replacing the Fuel Lines
To do this job, simply remove the other end of the fuel line or lines from the engine. Take care to ensure that the lines are not spilling any gas from them as you remove and discard them.
Take the lines you have purchased through Amazon or the hardware store and cut them to fit if they are not already the right sizes. Once they are sized properly, attach the fuel lines using the proper clamps to ensure they seal properly, and there will be no fuel leakage.
| Pros: | Cons: |
| Typically a cheap and easy way to ensure that there will be no failure from the lines for a long period of time | Added expense |
| Doing the work now will prevent having to work again on the fuel system soon | Extra time needed to complete the job |
| Ensures that any debris that might have been in the line is removed before running the engine again |
Final Thoughts
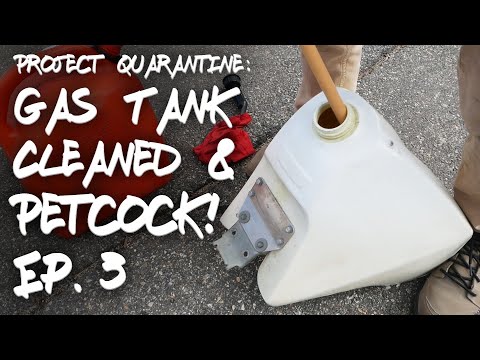
This YouTube video gives an excellent overview of removing and cleaning a two-stroke gas tank from a dirt bike. I suggest watching it to really get a feel for this process:
The cleaning of a two-stroke gas tank is not complicated in and of itself. The trick is really to make 100% sure that the tank is free of water or chemicals before the fuel is replaced. It’s good practice to flush the tank a couple of times with fresh fuel after cleaning to make sure there is no residual water or chemicals.