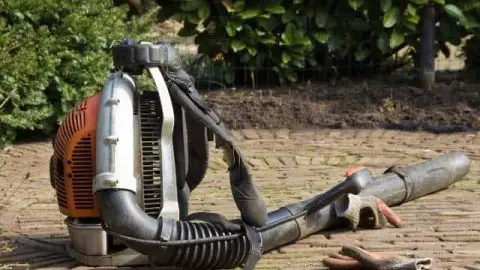
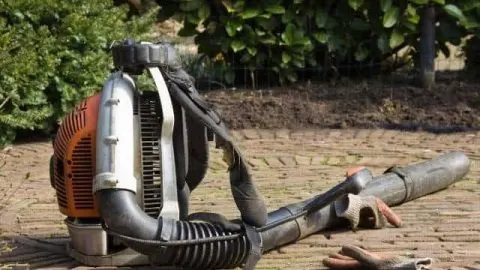
Most people do not give their leaf blower a second thought until it stops working. For people who live with lots of trees or other types of underbrush and leaves that pile up in the yard, a leaf blower is a convenient way to gather them all in one place to get rid of them. But, if your leaf blower’s engine is not working, can you rebuild it?
To rebuild a leaf blower engine, you will need to tear down and replace or repair the main parts of the engine. The main components of a leaf blower engine are:
- The spark plug
- The engine cylinder
- The carburetor
- The intake manifold
When it comes to getting the leaves and plant debris off of your lawn, there is no replacement for a leaf blower. This guide will give you the information you need to take apart your leaf blower engine, inspect or clean the parts, and then put it back together. If you have the tools and a little patience, you can quickly rebuild the engine.
How To Rebuild A Leaf Blower Engine
When it comes to rebuilding a leaf blower engine, it helps to understand how the leaf blower works and all of the engine’s components first. Leaf blowers can have different types of engines, depending on the model. Some leaf blowers consume gas, and others use electricity. Gas leaf blowers either have two-stroke engines or four-stroke engines.
Four-stroke engines are the most powerful, and electric leaf blowers are the least powerful. Depending on the type you chose, you might notice that some of the parts in the engine are shaped somewhat differently, but they function in very similar ways. By understanding the components of a leaf blower engine, you can see how they fit together for a rebuild.
Spark Plug
The spark plug makes the spark that ignites the air and fuel mixture that comes out of the carburetor. Depending on your leaf blower model, the spark plug can be located underneath the motor cover, or it might be easily visible. It always sits on top of the engine cylinder, as we discuss in a section below.
If you have a leaf blower that you are dissembling for cleaning or repair purposes before rebuilding it, you might decide to leave the spark plug where it is. Unless you are changing the spark plug, it can stay on the top of the engine cylinder and will not get in the way of your rebuild at any point.
Cylinder
The cylinder holds the crankshaft. One side will have a square-shaped hole for the exhaust, and the other side will have a circular hole for intake. The sparkplug connects to the top of the cylinder. The cylinder does not perform any duties other than holding things and providing a structure for the crankshaft. The crankshaft is made up of a few different parts:
- The bearings which look like moveable rings on a hook
- An end piece that has some gaskets inside
- The connecting rod
- The piston
Although you can remove the crankshaft from the cylinder, it is easier to keep track of the parts when the crankshaft stays inside the cylinder. If you take the crankshaft out of the cylinder, make sure that nothing gets lost and keep any screws separate from the others during your rebuild.
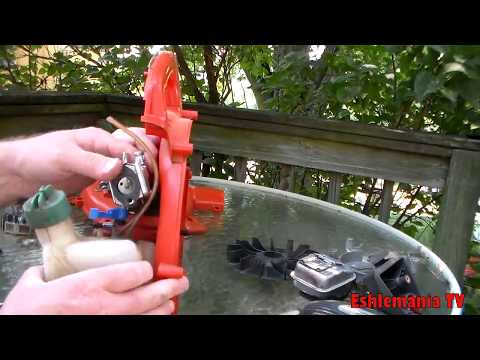
Carburetor
The carburetor mixes the air and the fuel before combustion (source). When rebuilding a carburetor, you should follow these steps, assuming you have a carburetor separate from the leaf blower. Do not attempt to rebuild a carburetor while it is connected to anything else.
- Put the lever and needle on the bottom.
- Screw them firmly in place (Most of the screws will require a Phillips screwdriver)
- Attach the gasket
- Put the diaphragm back on
- Screw on the bottom cover
- Screw on the top cover
- Attach the primer bulb
Once you have rebuilt the carburetor, you will need to put it back in the leaf blower and attach it to the engine. You will need to reattach the fuel lines and then attach the carburetor to the side of the engine with long screws. The rubber boot with the impulse lines is vital to note here because it forces the carburetor to suck up the fuel.
The carburetor should be connected to the gas tank immediately after being rebuilt. When it comes time to assemble the entire engine, you will want the carburetor and the gas tank to be installed simultaneously. While you screw on the gas tank, you will want the carburetor to be already attached so that you can easily slide it into place on the intake manifold’s prongs.
(Source: Sears Parts Direct)
Intake Manifold
The intake manifold connects through a gasket to the gas tank on a gas model of the leaf blower, which hooks onto the carburetor. The gasket stops the gas from leaking as it fuels the engine. When attaching the intake manifold to the bottom of the engine, you will need a couple of screws to ensure that it stays tightly secured and that there is no wiggle room.
During your rebuild, you should be aware of the prongs extending from the intake manifold. These prongs will extend through the carburetor to hold it steady and keep it aligned with the gas tank and the engine itself. When you attach the intake manifold to the engine cylinder, keep those prongs straight and firmly standing so the carburetor can slide down them.
Steps To Rebuild
This YouTube video is a great overview of the steps involved in disassembling and rebuilding a leaf blower. This author is working with a Husqvarna but the basic steps are pretty universal:
When you are ready to rebuild the engine, you should always ensure that you have all of the parts, tools, and tiny screws that you will need to assemble it correctly. While the pieces are dissembled, you could take the opportunity to clean them. Some people notice that dirty components make the leaf blower less efficient.
- Line the piston back up and insert the crankshaft into the cylinder.
- Screw the bottom cover onto the cylinder to cover the crankshaft.
- Push the rubber boot back on the side of the cylinder.
- Attach the muffler on the side of the cylinder.
- Snap in the spark plug on the top of the cylinder.
- Screw the intake manifold back onto the side of the cylinder so that it aligns with the rubber boot. NOTE: Ensure that the prongs are straight and sit snugly in the intake manifold. You want to avoid having the prongs lean to one side or another.
- Snap the cylinder into the opening in the leaf blower and screw on the bolt to hold it in place. You should use screws with shoulders in order to hold the engine still while it goes. The engine will try to vibrate, and the engine housing is usually made of plastic so that vibration can wear it down.
The screws’ shoulders will stop the engine from vibrating so much while the leaf blower is running.
- Slide the intake gasket along the intake prongs, which will extend towards the back of the leaf blower. NOTE: Be careful when sliding the gasket in order to ensure it does not rip during the process.
- Ensure that the carburetor is properly attached to the gas tank.
- Screw the gas tank firmly in place.
- Push the carburetor on.
- Screw on the cover over the engine.
These steps with vary a little depending on the manufacturer but the basic flow of disassembly and rebuilding are pretty much the same regardless of the brand.
In Conclusion
Rebuilding your leaf blower’s engine can take a little time and patience. Always remember to take any safety precautions necessary when fiddling with engines.