

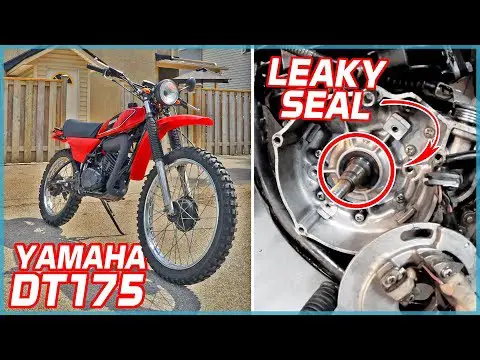
If you’re noticing a strange smell coming from your 2-stroke or experiencing an issue with it revving up, it might be time to replace the crank seals. A leaky crank seal could be allowing air or gearbox oil into places it doesn’t belong and causing all kinds of issues.
To replace the crank seals on a 2 stroke engine, there are several steps to follow, including cleaning/draining, disassembly and removal, replacement, and reassembly. The exact process will vary depending on your machine and which side needs replacing.
Read on to learn how to do this, one step at a time.
Replacing the Crank Seals on a 2 Stroke Engine
On a 2 stroke dirt bike, the seals on each side serve different functions and involve slightly different processes. The seal on the magneto/left side keeps air from getting into the combustion chamber, while the seal on the clutch/right side keeps crankcase oil from getting into the combustion chamber.
We’re going to start by explaining the process on the clutch/right side.
Start by Cleaning and Draining Fluids If Needed
Use a rag to clean any dirt or crud that may have accumulated around the clutch cover. You don’t want any of that falling inside your machinery once you start to open it up and take things apart. Once clean, remove the brake pedal and kickstarter and set them aside. Be careful not to misplace any hardware.
Next, drain the oil and coolant from the engine. You could theoretically lay the bike flat and keep the oil in place, but most people agree that it’s best to use fresh oil after replacing parts. Better safe than sorry!
Next, Remove Nuts, Bolts, and Covers
After you’ve cleaned and drained things, it’s time to grab some tools and start disassembling.
Remove the clutch cover and set the bolts aside, making careful note of where each one came from.
They’re not all identical, so it’s imperative to successful reassembly that you put them back in the same place they came from. If the cover is stuck, try tapping it with a rubber mallet to loosen it.
For this next step, you’ll need a pneumatic wrench or a clutch holding tool (link to Amazon). Take a photo of the position of the clutch and primary gear so that you can replace them as they were later. Use the pneumatic wrench or clutch tool to remove the boss nut from the crank and the primary gear.
Remove the Old Seal
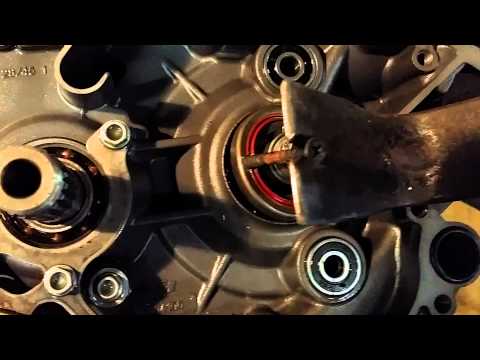
You should be able to see the crank seal at this point if you’ve removed all the various housing pieces correctly.
You’ll need a seal pick tool set (link to Amazon) for these next steps:
- Removal. Use the hook end of the tool to carefully remove the old seal without scratching or marking up other pieces of the engine.
- Wipe down. Once removed, use a rag to do a quick clean around the area, wiping up any leaked fluids. Now it’s time to install the new seal.
- Replace. Gently install the replacement seal and tap it into place so that it fits exactly as the previous seal had.
This YouTube video offers a great little hack on the removal process:
Be sure to grease the new seal lightly with your preferred mix.
Reassemble the Nuts, Bolts, and Covers
Now that the new seal is in place reassemble the housing and parts in reverse order. Remember to pay careful attention to the placement of different nuts and bolts. Refer to the photos you took earlier to ensure that you are placing things back as they were.
- Replace the cover with a new gasket and tighten the clutch cover bolts. They should be tight but don’t over-tighten them.
- Reattach the brake pedal and kickstarter.
- Refill the engine with fresh oil and coolant.
Note: Do not refill using the previously drained fluids. Always use fresh fluids when refilling.
Start up the engine and let it idle for a few minutes. If something still seems off, you may need to adjust your oil mixture to get it humming just right. And if everything went smoothly, then you should be all finished! Let’s jump to the other side of the bike and replace that side too.
Replacing the Crank Seal on the Magneto Side
Replacing the crank seal on this side is very similar and maybe even a bit simpler. For starters, there is no need to drain the oil or fluids when replacing this side only. You can jump right into some disassembly.
Carefully Remove Nuts, Bolts, and Covers
First, remove the rotor nut and then remove the rotor cover. Now you should be able to move on to removing the stator/ignition assembly. Just as before, pay close attention to where each nut and bolt belongs so that they can be replaced properly at reassembly.
Remove and Replace the Crank Seal
At this point, you should be able to remove and replace the crank seal, just as discussed previously. If the seal pick is proving to be too difficult to use, some people recommend using a drywall screw and hammer to remove it. Start by poking the screw through the seal, just enough that it catches. Then use the claw end of the hammer to pry the seal out from its home.
Reassemble the Housing
Once you’ve replaced the seal, carefully reassemble the pieces in reverse and start the bike, letting it idle for a few minutes to ensure that things are running smoothly. You’ve now successfully replaced the seal on both sides!
If you are still struggling with following this process, watch this YouTube video that gives a complete walk-through:
Things to Look Out for When Replacing the Crank Seal.
- Puts nuts and bolts back correctly: There will be a lot of loose nuts and bolts. Be sure that each one goes back exactly where it was.
- The crank seals are directional: The spring looking side should be facing into the chamber. The engine will still run if you put these in backward, but it will likely wear down your parts faster.
- Don’t overtighten anything: You want to make sure bolts are tight, but don’t push them too far to the point that they break. If they are over tightened during this, it’s possible they will be too stressed and break during use.
- Be cautious of sealant fluids: Some folks heavily advocate for the use of these sealants on the outside, while others swear by a clean and dry seal. The dry seal is the “traditional” method, but people report success with both methods.
What Will It Cost to Replace the Crank Seals?
If you already own the various necessary tools and wrenches and are used to performing this sort of maintenance, then the cost is limited to new seals, oil, and your time. A fairly affordable operation for the home mechanic.
If you lack the tools, like a pneumatic wrench and an air compressor, then the cost goes up quite a bit. The impact wrench (link to Amazon) is part of that equation but the compressor is often considerably more than that.
Having the right tools is crucial to being able to accomplish this on your own for a reasonable price.
Should You Replace the Crank Seals on Your 2 Stroke Engine?
If you never have, then probably. Like any engine parts, they take some damage over time and need to be replaced. If you’re serious about committing to small engine repair, then invest in the quality tools to get the job done, and after a while, jobs like these will be much easier.