
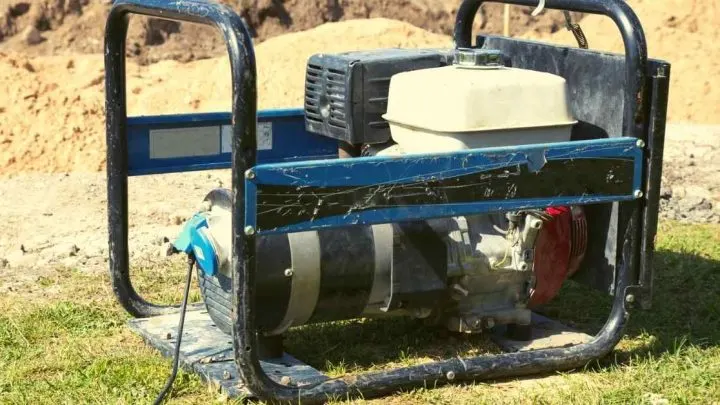
If you’ve been having trouble with your generator, it could be that the capacitor is bad. A bad capacitor can cause many problems, so it’s crucial to test it and ensure it’s working correctly. But how do you test a generator capacitor?
Here’s how to test a generator capacitor in 9 steps:
- Test the capacitor for continuity.
- Test the capacitor for capacitance.
- Test the capacitor for leakage.
- Test the capacitor for insulation resistance.
- Test the capacitor for dielectric strength.
- Test the capacitor for loss tangent.
- Test the capacitor for self-inductance.
- Test the capacitor for temperature coefficient.
- Compare test results to the manufacturer’s specifications.
In this blog post, I’ll show you how to test a generator capacitor using the above steps. I’ll also provide some tips for protecting your capacitor. So, if you’re having generator problems, this is one blog post you will not want to miss!
1. Test the Capacitor for Continuity
The first step in testing a generator capacitor is to test for continuity. In simple terms, continuity means having a complete path for electricity to flow. Generally, a working capacitor shouldn’t have any continuity.
To test for continuity, you’ll need a multimeter. A digital multimeter like this Fluke 117 Digital Multimeter (available on Amazon.com) may come in handy. It has a sizable LED-backlit display that makes the readings easier to see, making it an excellent multimeter for beginners and experts alike.
Once you have your multimeter, follow these steps to test your generator capacitor for continuity:
- Set your multimeter to the continuity check setting.
- If your multimeter has a built-in beeper, turn it on.
- Place one lead of the multimeter on one of the generator capacitor’s terminals.
- Place the other lead of the multimeter on the other terminal of the capacitor.
- If the multimeter makes a long beep, there is continuity, and the capacitor is shorted. If there is no beep, there is no continuity, and the capacitor is open.
If the multimeter shows the capacitor is open but it hasn’t been working correctly, it may still be bad. In such a case, you’ll need to proceed to the next step of testing the capacitor’s capacitance.
Caveat: Before performing any of the tests in this article, ensure you’ve turned off your generator, let it cool, and uninstalled the capacitor you need to test. Also, put on gloves to protect yourself from electric shock.
2. Test the Capacitor for Capacitance
The second step in testing a generator capacitor is to test its capacitance. The capacitance of a capacitor is measured in Farads (symbolized by “F”). It shows how much electrical charge a capacitor can store (source).
To test the capacitor’s capacitance, you’ll need a digital multimeter like the one I recommended in the previous step. Once you have your multimeter, follow these steps:
- Set your multimeter to the capacitance check setting.
- Connect the multimeter leads to the capacitor terminals.
- Note the reading on the multimeter display.
- Compare the reading to the capacitor’s specific capacitance.
The capacitor is good if the reading is within the specified range. If not, then it’s likely bad and needs to be replaced.
3. Test the Capacitor for Leakage in a Circuit
The third step in testing a generator capacitor is to test for leakage. Leakage is when current flows through the capacitor even when there’s no voltage applied. That’s usually caused by a manufacturing defect or damage to the capacitor.
To test for leakage, you’ll need:
- A digital multimeter.
- An AC voltage source. I recommend using a 9-volt battery as your AC voltage source.
- An LED.
- The capacitor you need to test.
Once you have all the necessary supplies, follow these steps to test your generator capacitor for leakage:
- Turn off your generator and disconnect it from the power source.
- Remove the capacitor from the generator.
- Create a circuit with the capacitor, the LED, and the AC voltage source, ensuring the capacitor is between the LED and the positive side of the AC voltage source.
- Connect the multimeter to the capacitor, with the red lead on the positive side of the capacitor and the black lead on the negative side.
- Set your multimeter to “AC Voltage” mode and note the reading.
- Turn on the circuit and observe the reading on the multimeter and the LED’s behavior.
If the capacitor is good, the multimeter should show a voltage drop, and the LED should not light up. If the capacitor is bad, the multimeter will show no voltage drop, and the LED will light up.
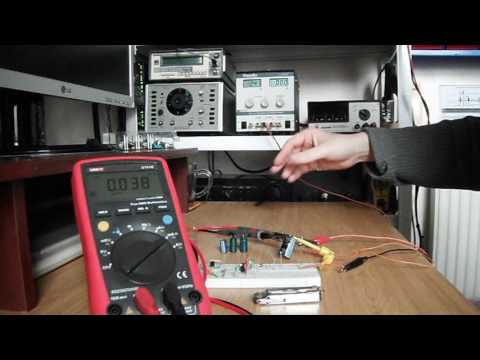
Here’s a video demo of how to test a capacitor for leakage:
4. Test the Capacitor for Insulation Resistance
The fourth step in testing a generator capacitor is to test for insulation resistance. In simple terms, insulation resistance measures how well the capacitor’s dielectric material (usually paper or plastic) can insulate the electric current flowing through it. A good capacitor will have a remarkably high insulation resistance, typically infinity.
To test the capacitor for insulation resistance, you’ll need:
- A digital multimeter.
- The capacitor you need to test.
Once you have those supplies, follow these steps:
- Turn off your generator and disconnect it from the power source.
- Remove the capacitor from the generator.
- Set your multimeter to the ohms setting and touch one lead to each capacitor’s terminals.
- The reading on the multimeter should be infinity; if not, the insulation between the capacitor’s plates is damaged and needs to be replaced.
Note: If you’re using a digital multimeter, it will read “0.L.” On the other hand, if you’re using an analog multimeter, the needle will go to the very far left on the dial.
5. Test the Capacitor for Dielectric Strength
The fifth step in testing a generator capacitor is to test its dielectric strength. Dielectric strength measures how well the capacitor’s dielectric material can withstand voltage without breaking down. In other words, it measures how much electrical stress the capacitor can take before it fails.
To test for dielectric strength, you’ll need:
- A multimeter.
- A high, variable voltage AC source.
Once you have the required tools, follow these steps:
- Connect the leads of the multimeter to the capacitor’s terminals.
- Turn on the AC source and slowly increase the voltage until you reach the specified value in the capacitor’s datasheet. At this point, you should see a sharp increase in the readings on the multimeter.
The capacitor is good if the reading on the multimeter is within the specified range. If not, then it’s likely bad and needs to be replaced.
6. Test the Capacitor for Loss Tangent
The sixth step in testing a generator capacitor is to test for loss tangent. The loss tangent measures how much energy the capacitor loses as heat. A higher loss tangent means the capacitor loses more energy as heat, which isn’t ideal.
To test for loss tangent, you’ll need:
- An AC power supply.
- A digital multimeter.
- A resistor (preferably a 10-ohm resistor).
Once you have those supplies, follow these steps:
- Create a circuit with the capacitor, the resistor, and the AC power supply.
- The capacitor should be in series with the resistor.
- Turn on the AC power supply and set it to the specified voltage in the capacitor’s datasheet.
- Measure the voltage across the capacitor with the multimeter. That’s known as the capacitive voltage.
- Measure the voltage across the resistor with the multimeter. That’s known as the resistive voltage.
- To calculate the loss tangent, divide the capacitive voltage by the resistive voltage.
The result should be within the specified range in the capacitor’s datasheet; if not, the capacitor is bad and needs to be replaced.
7. Test the Capacitor for Self-Inductance
The seventh step in testing a generator capacitor is to test for self-inductance. Self-inductance measures how much the capacitor’s inductor resists changes in current. A good capacitor will have a low self-inductance.
To test the capacitor for self-inductance, you’ll need:
- An AC power source.
- A multimeter.
Once you have these items, follow these steps:
- Connect the multimeter’s positive lead to the capacitor’s positive terminal and the negative lead of the multimeter to the negative terminal.
- Observe the reading on the multimeter with the AC power source turned on.
If the reading is high, this indicates that the self-inductance of the capacitor is high.
8. Test the Capacitor for Temperature Coefficient
The eighth step in testing a generator capacitor is to test for temperature coefficient. The temperature coefficient measures how much the capacitor’s capacitance changes with temperature compared to its rated value.
To test for temperature coefficient, you’ll need:
- A thermocouple.
- A digital multimeter.
- An AC power source.
- A pencil.
- Graph paper.
Once you have those supplies, follow these steps:
- Connect the thermocouple to the capacitor’s terminals.
- Turn on the AC power supply and set it to the capacitor’s rated voltage.
- Measure the capacitance with a digital multimeter.
- Record the temperature and capacitance values.
- Repeat steps 3 and 4, but this time change the temperature by 10 degrees Celsius (50 degrees Fahrenheit).
- Repeat steps 3-5 until you have data points for at least five different temperatures.
- Plot the temperature and capacitance values on a graph. Calculate the slope of the graph. That will give you the capacitor’s temperature coefficient.
9. Compare Test Results to Manufacturer’s Specifications
The final step in testing a generator capacitor is to compare your test results to the manufacturer’s specifications. If any of your tests fall outside the specified range, the capacitor is bad and needs to be replaced.
You can find the manufacturer’s specifications in the data sheet for the capacitor. The data sheet will also list the capacitance tolerance, which is the range of values considered acceptable.
For example, if a capacitor has a capacitance of 10uF ± 20%, it’s considered acceptable if the actual capacitance is between 8uF and 12uF.
If you don’t have the datasheet for the capacitor, you can usually find it online. Just search for the capacitor’s model number.
Note: If you test the capacitor and discover it’s damaged, dispose of it properly. Capacitors can contain harmful chemicals, so they should not be thrown in the trash. Consult your local waste management authority for instructions on properly disposing of a capacitor.
Also, note that you don’t have to follow all nine steps every time you test a capacitor. Continuity, capacitance, and leakage tests are usually enough if you’re just trying to determine whether a capacitor is good or bad. Just ensure that you’re using the correct settings on your multimeter for each test.
Tips for Protecting a Capacitor
Now that you know how to test a generator capacitor, let’s look at some tips on protecting it. Although it’s a relatively cheap and easy-to-replace part, a damaged capacitor can cause all sorts of problems for your generator.
By following the tips below, you can help extend the life of your generator’s capacitor and avoid costly repairs.
Keep the Capacitor Cool
One of the leading causes of capacitor failure is overheating. When a capacitor gets too hot, the electrolyte inside starts to break down, which reduces the capacitor’s ability to store energy. That’s why keeping the capacitor cool is essential, especially in hot weather. (source: International Journal of Engineering Research and Application: The Effects of Heat on Electronic Components)
There are a few things you can do to keep the capacitor cool:
- Make sure the capacitor is adequately ventilated. If possible, install the capacitor in a shaded or cooler area.
- In hot weather, run the generator for shorter periods and allow the capacitor to cool down between uses.
Prevent Electrical Surges
Another common cause of capacitor failure is electrical surges. A sudden spike in voltage can damage the capacitor’s dielectric material and cause it to leak.
Ensure your generator is properly grounded and protected from lightning strikes to avoid electrical surges. In addition, use a surge protector for any electronic devices connected to the generator.
Keep the Capacitor Clean
Another important way to protect your capacitor is to keep it clean. Over time, dust and other pollutants can build up on the capacitor’s terminals, preventing it from working correctly.
To clean the capacitor:
- Disconnect it from the generator.
- Wipe down the terminals with a clean, dry cloth. Avoid using water or other liquids, as they can damage the capacitor.
Replace the Capacitor When Necessary
Even if you take all the necessary precautions, there will come a time when you need to replace your generator’s capacitor. Most capacitors have a lifespan of about 10,000 hours, so it’s essential to keep an eye on yours and replace it when necessary.
If you’re unsure whether the capacitor needs to be replaced, it’s always best to err on the side of caution and get a new one. That way, you can avoid any potential problems down the road.
Final Thoughts
By following the steps above, you can quickly test a generator capacitor and ensure it’s in good working condition. By taking the time to do these tests, you can avoid potential problems and keep your generator running smoothly for years.
Remember, a damaged capacitor can cause all sorts of problems for your generator, so it’s essential to take the necessary precautions to avoid any damage.
Recommended Reading