Getting a generator is a great way to have a source of electricity, whether it’s for powering your devices or having a secondary backup when the electricity’s out. But it’s essential to keep your generator in check. One of the most critical parts of this is the generator rotor.
Here’s how to test a generator rotor:
- Understand how a generator works.
- Find the necessary tools.
- Disconnect the electrical load.
- Connect the voltmeter and warm up the generator.
- Compare the voltage readings.
- Flash the field.
- Check the rotor.
- Perform additional tests on the rotor.
So, let’s walk through the steps together and talk more about how to diagnose issues with your generator’s rotor. I’ll walk you through the tests you can perform and talk more about some of the tests that a professional can perform to troubleshoot your generator’s performance.
1. Understand How a Generator Works
The onboard alternator of a portable generator converts mechanical energy into electrical current, which you can use to supply power to your home.
Transforming mechanical energy into electrical energy is how a portable generator works. Most devices start using gas since it is an easy, inexpensive, and readily available fuel source, but you may also locate machines that run on diesel or propane.
The operation of home generators involves carefully monitoring the voltage supply in your home. It will immediately switch off to prevent any loss of electricity once it identifies a problem.
So, before we get into the nitty-gritty of testing your generator rotor, It would be best to ensure that we are all on the same page and understand how a generator works.
The Different Parts of a Generator
There are five different parts of a generator:
Combustion Engine
The combustion engine handles the conversion of fuel into energy. It creates a spark, which allows the alternator to create an electrical current. The amount of electricity produced by the generator usually depends on the size of the engine.
Alternator
The most important part of the generator, the alternator, consists of several different parts. These are the rotor, the automated voltage regulator, and a stator. These parts work together to turn the engine inside your generator, thus creating electricity.
Starting Mechanism
Your type of starting mechanism may vary, descending on the generator’s model. They usually have a starting cord that you pull on to turn over the engine. Other models might involve an automatic starting mechanism connected to an outlet that automatically activates when it detects a voltage drop.
Fuel Tank
The fuel tank is where the gas, diesel, or propane is stored. The fuel tank directly feeds into the combustion engine, and standard portable generators can hold up to 15-20 liters of fuel. The exact capacity can vary on models. Usually, you will find generators that use diesel, propane, or gas to produce electricity.
Control Panel
The generator’s control panel serves as the user interface for the device. It gives the operator of the generator the ability to monitor the different systems of the generator and adjust those systems as required.
These controls may measure the voltage generated by the generator, the quantity of electrical current, and the current frequency. You can see the system’s status using a variety of gauges and displays, and you can alter the generator’s parameters using several buttons and switches. The design of the panel might vary between generators.
Outlets
The generator’s power outlet is where you connect the cables from the generator to wherever you need the electricity. Different models have varying outlets, and newer models usually have a wider variety of outlets to connect your appliances.
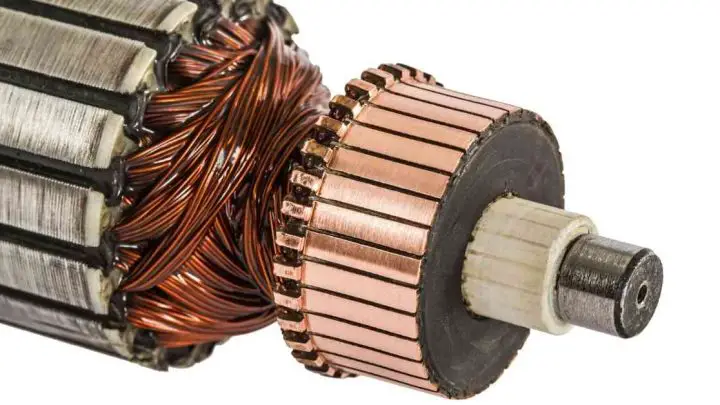
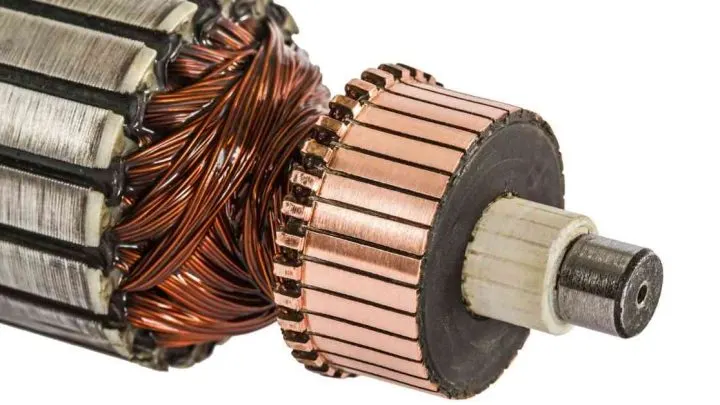
The Rotor
This brings us to the main topic of our guide, the rotor. How does it work, and what do you need to know about it?
The rotor (also called the armature) is a rod-shaped moving magnet encased within a conductor. The rotor isn’t stationary and instead is a moving part.
Since a generator requires mechanical energy to produce electricity, the rotor plays the most crucial part by generating an electric field between it and the stator, a set of electrical conductors in coils.
2. Find the Necessary Tools
Before you can check your generator’s rotor, you’ll need some essential electrical equipment.
Here’s what you’ll need:
1. A screwdriver to unbolt any screws.
2. An AC voltmeter(or a volt-ohm-milliammeter) for measuring voltage.
3. An AC frequency meter to measure AC frequency.
3. Disconnect the Electrical Load
Disconnect any appliances connected to the generator and ensure that nothing is connected when starting the procedure to ensure that you don’t get an electrical shock when operating the machine. It is also critical to disconnect it from any power source or outlet to ensure that you get a correct reading.
4. Connect The Voltmeter and Warm Up the Generator
Next, connect the AC voltmeter/ volt-ohm-milliammeter VOM into the generator receptacle and start the generator. Let it run and warm up. This process will usually take two to three minutes, so stand by for a bit while your generator gets up and running.
5. Compare the Voltage Readings
Once the generator is warm and running, you can accurately read how well the rotor functions. To determine if there are any issues, read the voltmeter, then follow these steps:
1. If the voltage reads at zero or less than 6VAC, move to step 5.
2. If voltage is low but above 6VAC, and AC frequency is normal, move to step 6.
6. Flash the Field
If you’ve made it to step 5, your generator is outputting less energy than it should be. Here’s what you can do about it.
Suppose the alternator has a brush or bridge rectifier. You need to remove the red/blue wires (also referred to as wires 2&6) from the rectifier terminals J-1 and J-2, following the connection procedure mentioned below.
This process requires a 12 VDC battery since you’ll charge the generator nodes to get the rotor started. Start the engine, let it warm up, and connect the battery to the brushes according to their terminals (positive to positive and negative to negative).
Let it stay connected for about 5 seconds, then disconnect the cables. The generator should be delivering the correct output once you start it.
7. Check the Rotor
Before checking the rotor, ensure that the brushes and slip rings aren’t damaged. Set your volt-ohm-milliammeter VOM to “OHM,” then follow the steps.
- Check rotor resistance. Remove the brush assembly, connect the test leads to the rotor slip rings, and compare the readings to the appropriate generator manual. If there’s an extremely high reading, this indicates an open circuit in the rotor. You can identify a shortened rotor by low resistance. This issue will require a rotor replacement.
- Rotor current draw test. Isolate the brush wires from the bridge rectifier and the voltage regulator and connect an amp meter (DC) between the positive brush wire #4 and the positive node on a 12VDC battery. Do the same for the negative wire and connect it to the negative node on the battery.
- Start the engine and monitor the amp draw.
This step gets a bit technical since you’ll use Ohm’s law to calculate the desired amp.
The equation you’ll need is: voltage divided by amperage equals resistance. So, for example, 6VDC divided by a rotor resistance of 12 ohms equals an amp draw of 0.5 amp.
Once you calculate the amp draw, analyze it and follow one of the following steps:
- If the rotor current draw is higher than specified, you’ll need to replace it since this indicates that there’s a short exit within the rotor.
- If the current draw is lower than specified, replace the rotor as there is a flying open in the rotor.
- The rotor is ok if the draw is within the acceptable limit.
Suppose the readings aren’t between 5-10v, and the brushes don’t seem to be significantly damaged. In that case, the chances are that your rotor is damaged and needs replacing.
8. Perform Additional Tests on the Rotor
Let’s move on to rotor testing methods that are more suited for portable generators. You can use these methods to quickly test for alternator, rotor, or wiring issues as long as you follow the instructions.
Ensuring that your generator works perfectly involves regular maintenance and checking of the individual components. However, the brunt of your checking will usually be restricted to the alternator, where the rotor is.
The first part is to check whether your alternator is brushed or brushless since both have different mechanisms. We’ll go over the specifics of each of them now.
Check the Alternator Type
Brushed Alternator
A brushed alternator connects the rotor to a carbon brush, which conducts the electricity from the rotor to the outlet, where it can divert to the required device. Brushed alternators are usually viable for smaller loads since the wear and tear on these parts can also damage the rest of the machinery.
Brushless Alternator
A brushless alternator doesn’t require a carbon brush. Instead, it has two different rotors and a separate, smaller generator that helps transfer the current. These are much more durable and require less maintenance but are more expensive than brushed alternator generators.
While we did mention the primary method to test the rotor of a brushed alternator, you should read this portion to know precisely what you’re dealing with and the best way to test your rotor.
The Growler Test
The growler test will help you identify whether there are interruptions in the flow of current through a rotor bar due to blown-out wires, loose laminations, or cracking. It’s accomplished with the rotor being entirely separated from its stator and linked to an armature growler, a coil of wire wound around an iron core and connected to a source of alternating current (AC).
This growler performs the function of an open-ended transformer. It produces alternating current (AC) power into the rotor’s armature to determine the existence of shorted turns. The operators place a feeler, commonly a hacksaw blade, on top of the rotor and rotate it while listening for areas where the feeler “growls” or vibrates.
If this occurs, it indicates a problem with the magnetic field created. As a result, there is a problem with the rotor’s mechanical functioning. This test can be somewhat risky since it utilizes an open-ended transformer design. Therefore, having a competent technician is necessary.
Single-Phase Rotor Test
You can perform a single-phase rotor test to look for fractured rotor bars. You should only perform this test after disconnecting the generator from its power source.
To do the single-phase test:
- Slowly turn the motor. This slow turning will deliver a single-phase power supply with a low voltage and several amps to the motor.
- Use an analog meter to check for any variations in the amount of current drawn from it.
- If the stator current drops or increases significantly, this is a sign that one or more of the rotor bars are fractured or cracked.
If there are no amps variations, you’re good to go.
High Current Rotor Test
During this test, you send a strong current through the rotor shaft with the rotor removed from the stator.
During this process, a technician scans the outside diameter of the rotor using an infrared or thermal-scan camera to look for localized hot areas, indicating uneven heating of the rotor.
If the temps are irregular or uneven, the rotor will begin to bend and become unbalanced.
This type of localized heating can also generate stress on the bars, leading to early breaking and fatigue.
Final Thoughts
Hopefully, you now understand the workings of a regular portable generator, its importance, and how to test the most critical component in the alternator, the rotor.
There are different ways to test your generator depending on whether it’s a brushed alternator generator or a brushless alternator generator, and the testing method differs slightly. Always remember that it’s best to get the help of a professional since they will be able to help you understand the specifics of your generator.
Recommended Reading