

Sometimes, two-stroke engines can blow and break down on you. If this happens, the engine is unusable until it is fixed. But the average person probably does not know where to start when it comes to fixing their machine.
If this describes you, do not worry! With a little guidance, you can fix your engine. So, keep on reading to learn how to fix your blown two-stroke engine. That way, you can get it back into operation as soon as possible!
Find a Workspace, Prepare Your Tools, and Clean
First things first, you will want to find and prepare your workspace. You are going to be working with a lot of parts so get a plan together on how you are going to keep it all organized.
Preferably, you will want a solid table to work on, and small bins to put tools and engine pieces in so that they are not lost. You also want the workspace to be well lit. This will also make it easier to spot things you may drop.
Also, make sure to have the owner’s manual on hand. That way, you can make sure you know important information such as torque specs.
Then you should clean whatever machine you are fixing. For example, if you are fixing your dirt bike’s two-stroke engine, you will want to clean the dirt bike. That way, you can keep out dirt and other debris that can ruin an engine.
Along with cleaning, you will also want to drain any coolant or gas that is in the engine prior to beginning disassembly.
Disassemble the Engine
Since the engine internals are fragile, be careful when disassembling. You need to make sure that nothing goes into the bottom end of the engine. Dirt, dust, tools, other engine components, all these can cause severe damage if they get into the bottom end.
With that in mind, let’s begin taking apart the engine so we can access the components we need to fix.
If you still have your owner’s manual, follow their disassembly instructions. If you don’t have them but can find them online, then use those instructions.
If you can’t find the manual or instructions online, there are some general guidelines that you can follow to do this.
- Remove the cylinder head. This is done by loosening the cylinder head nuts. Remove the head and tap it, so the nuts and washer come out. Move the piston to BDC
- Now take out the cylinder head gasket
- Next, you want to take off the “piston circlip, wrist pin, and piston.”
- Finally, take off the old gasket material and clean the mating surfaces
As you disassemble, assess the damage. For example, look for cracks in the cylinder head, check the piston tops for signs of melting, and check to see if the piston ring(s) are worn down.
Now that the engine is disassembled let’s begin fixing it.
Assess the Damage and Make the Repairs
Now that you have the components removed, it is time to start the repair.
If your engine is blown, then chances are you will have to do a full repair. That is, you will have to replace most of the parts to get the engine working again.
Check Piston Rings for Damage
First, inspect the piston and piston rings for damage. For piston rings, wear and damage is indicated by the coating being worn down on them.
This YouTube video may be helpful with the process of installing the piston rings:
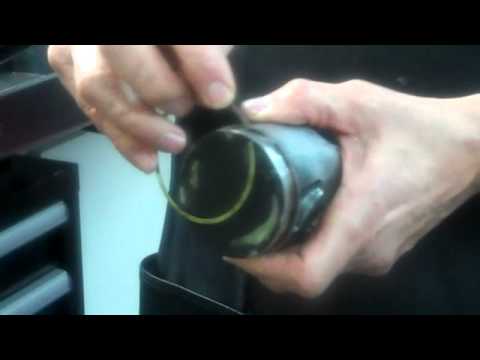
If the piston ring looks worn, then you need to replace it.
To reinstall the piston ring:
- First, slide the ring into the cylinder to see if it fits. Use a feeler gauge to measure the ring gap. For 50cc Standard, it should be .24mm-.26mm. For 100cc Standard, it should be .30mm-.45mm.
- Then, you slide the piston ring into the groove around the piston. You want to start at the pin that is in said groove. Wrap the ring around the groove so that it connects to the other side of the pin.
Next, you put in the circlip. This can be tricky, so wear protective glasses in case it decides to pop out at you. There are a few steps you will want to take to install it correctly:
- Slip one end into the circlip slot in the piston.
- Brace the other side with your thumb, and using a screwdriver, apply pressure so the top half-slips in.
- Keep your thumb where it is, and then use the screwdriver to push the other end in.
Again, visual demonstration is really handy here so watch this informative YouTube video:
Now that you have installed the piston ring and circlip, you can install the piston.
Make sure that you don’t put the piston in backward. There are a few ways to make sure it is facing the correct way:
- If there is an arrow or an E on the piston, face that side toward the exhaust
- If there is an I, face that side toward the intake.
The Gasket and Cylinder Could Have Carbon Buildup
Now, check the gasket. If you see metal discoloration or carbon buildup, you will need to replace it, as these signs indicate it is leaking.
Once you have done this, check your cylinder.
If there is normal wear and tear, you can hone it. Honing is just the process of smoothing out any imperfections. Be aware though; cylinders have cross-hatching lines, so do not confuse these as damage to your cylinder.
What you really want to pay attention to is major damage to the cylinder. This includes gouging, dents, etc. If you notice this, then get a replacement cylinder.
After you have done repairs or bought new components, you can replace the cylinder. To do this:
- “Place the piston at BDC and lower the cylinder so it sits on the piston rings.”
- Then, push the edges of the rings with a non-metal tool. Do this so the cylinder sits on the gasket.
Finishing it all Up
Now, there are just a few more steps you need to take to get your engine back in working order:
- Lubricate the inside of the cylinder with engine oil. Make sure the piston moves easily. Make sure the cylinder head is still in good enough shape to use; if it is not, replace it.
- Screw the pieces of the cylinder head back together, making sure you follow the manual when it comes to the torque you should use.
- Run it for a few minutes, then torque again to account for heat expansion.
Then you are done! Your engine is repaired, and you can get back to using it once more!
Keeping An Engine from Blowing
Fixing a blown engine can take time, and if you have to buy parts, it can cost quite a bit of money. With all the replacement parts included, it can cost upwards of $500 if you do a full repair.
To prevent this from happening again, here are some steps to take to make sure your engine does not blow:
- No Ethanol– do not use ethanol-based fuel. Instead, use petrol fuel mixed with oil. Ethanol fuel can severely damage your engine.
- Keep it Clean– Keeping your machine clean, by removing dirt and other particles, can extend the life of the engine.
- Top End Rebuild- make sure you do keep up with top-end rebuilds. If you do them consistently enough, you may only have to repair parts instead of replacing them altogether.
There are also signs you can look out for that could indicate your engine is about to blow:
- Running Issues: If your engine struggles to start, has inconsistent performance, spews excessive smoke after warming the engine, and/or produces excessive noise from the engine’s top end, you will want to run an engine diagnostic. All these are signs of looming engine failure.
- Liquid loss- loss of gearbox oil, excessive coolant loss from the overflow tube, and weeping of your coolant are all indicators that something could be wrong with the engine. If you notice this, then open the engine to look for issues.
Conclusion
Fixing your blown two-stroke engine may seem like a daunting task. After all, you don’t want to make things worse than they already are! You should not worry, though. With instructions by your side, you can take on this task!
Just remember to go slow, be careful, and ask for help if you need it!